
With this section of blocking, I'm going to start with a retopologized 3D scan from 3D Scan Store. The original 3D scan will be altered in anatomy as well as texture for the final render. I decided to invest in the Female 03 body scan. The scan had a great mesh base that I knew I would manipulate to a different body shape. The face had an awesome broad nose that would give me lots of flexibility to play with different nose shapes. The texture maps that came along with the scan also were very intriguing. The red and yellow undertones of the scan were amazing and the skin imperfections looked very fun to play around with.
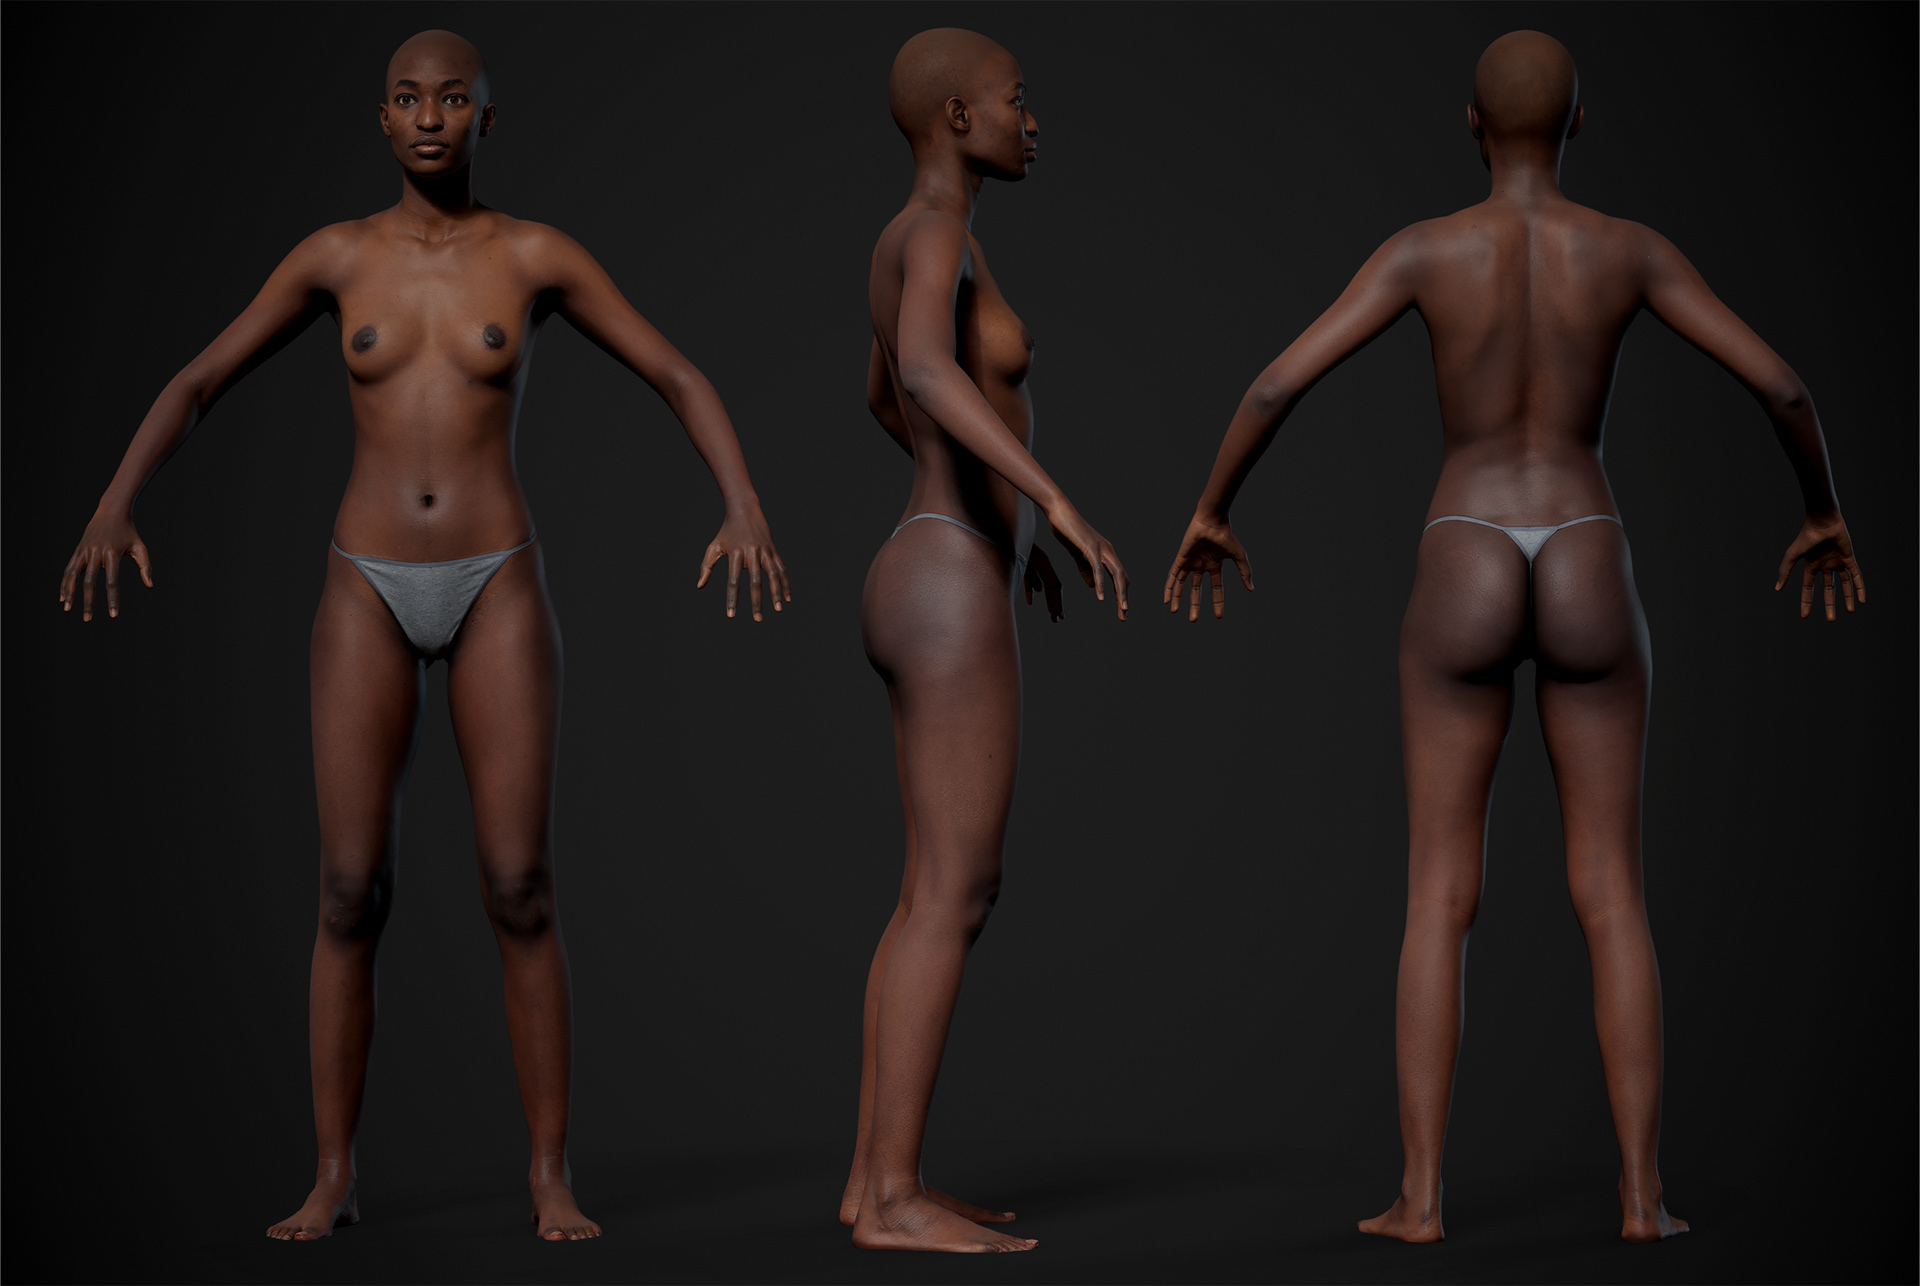
Image from 3D Scan Store
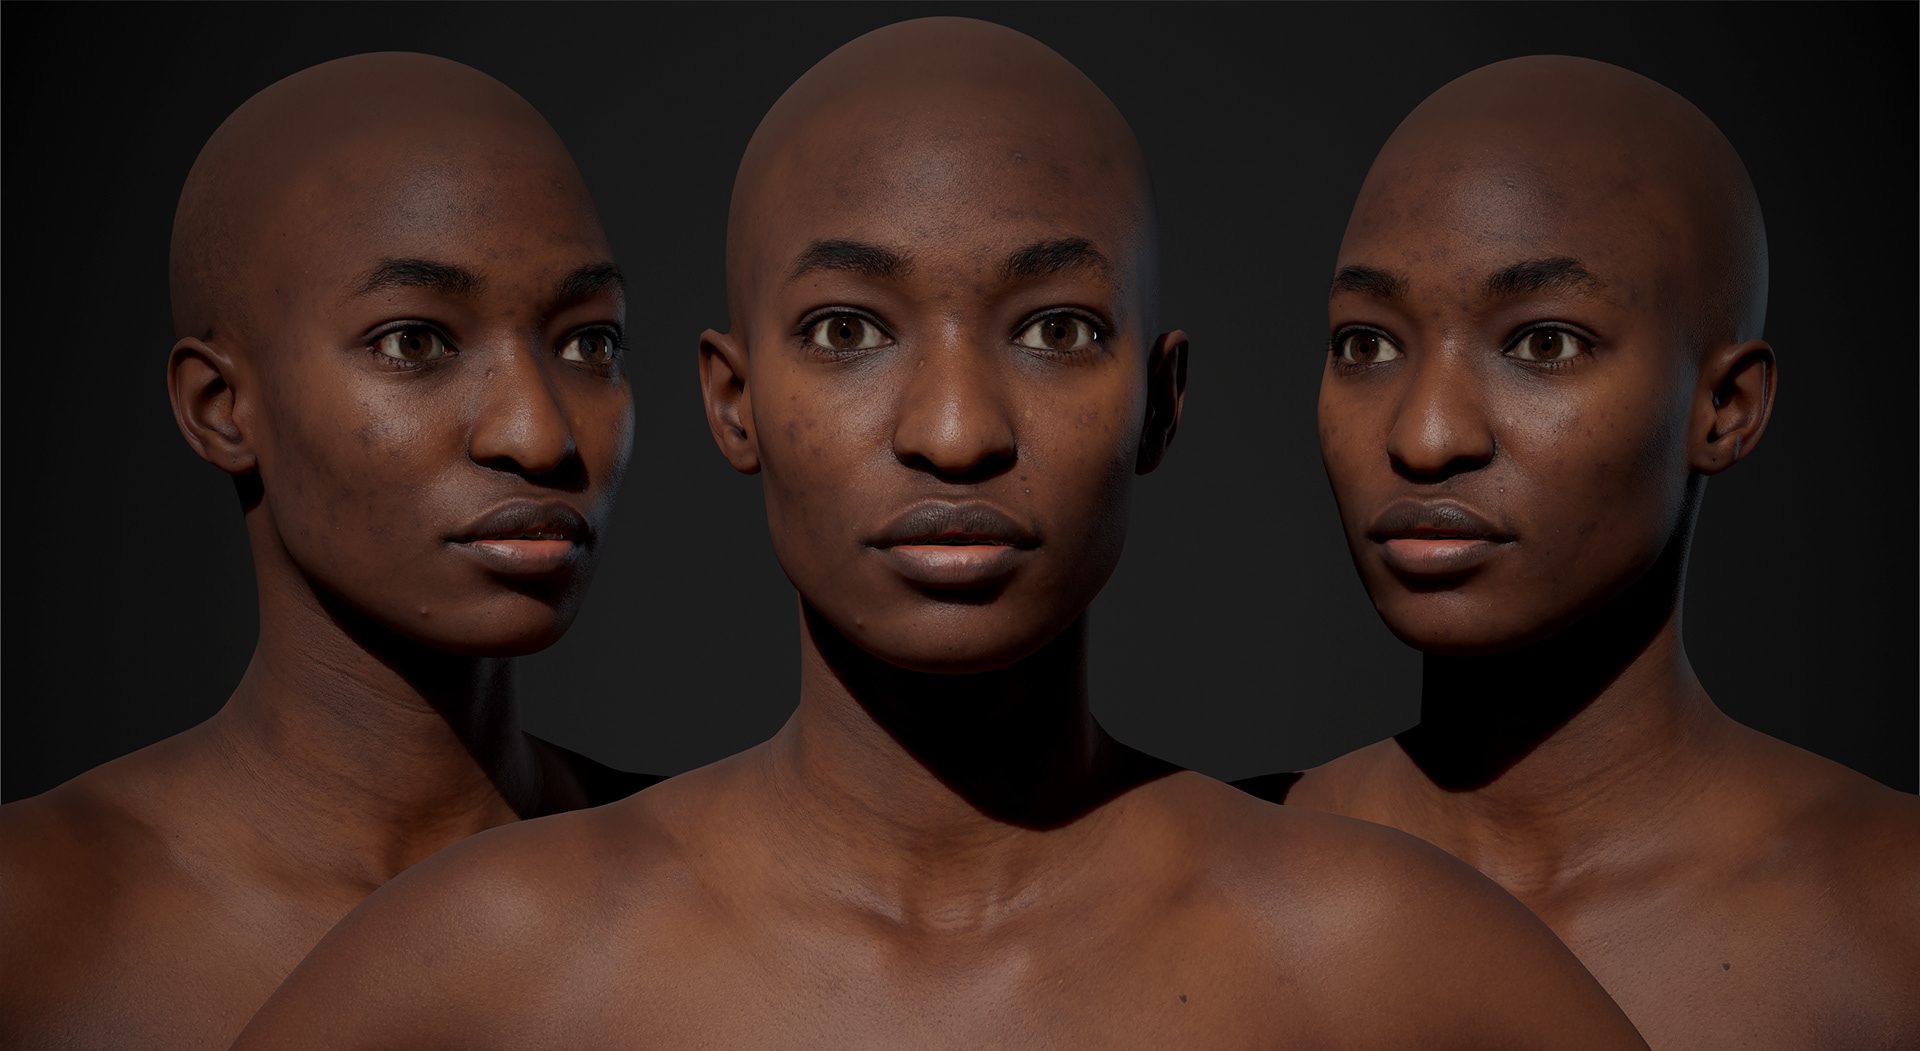
Image from 3D Scan Store
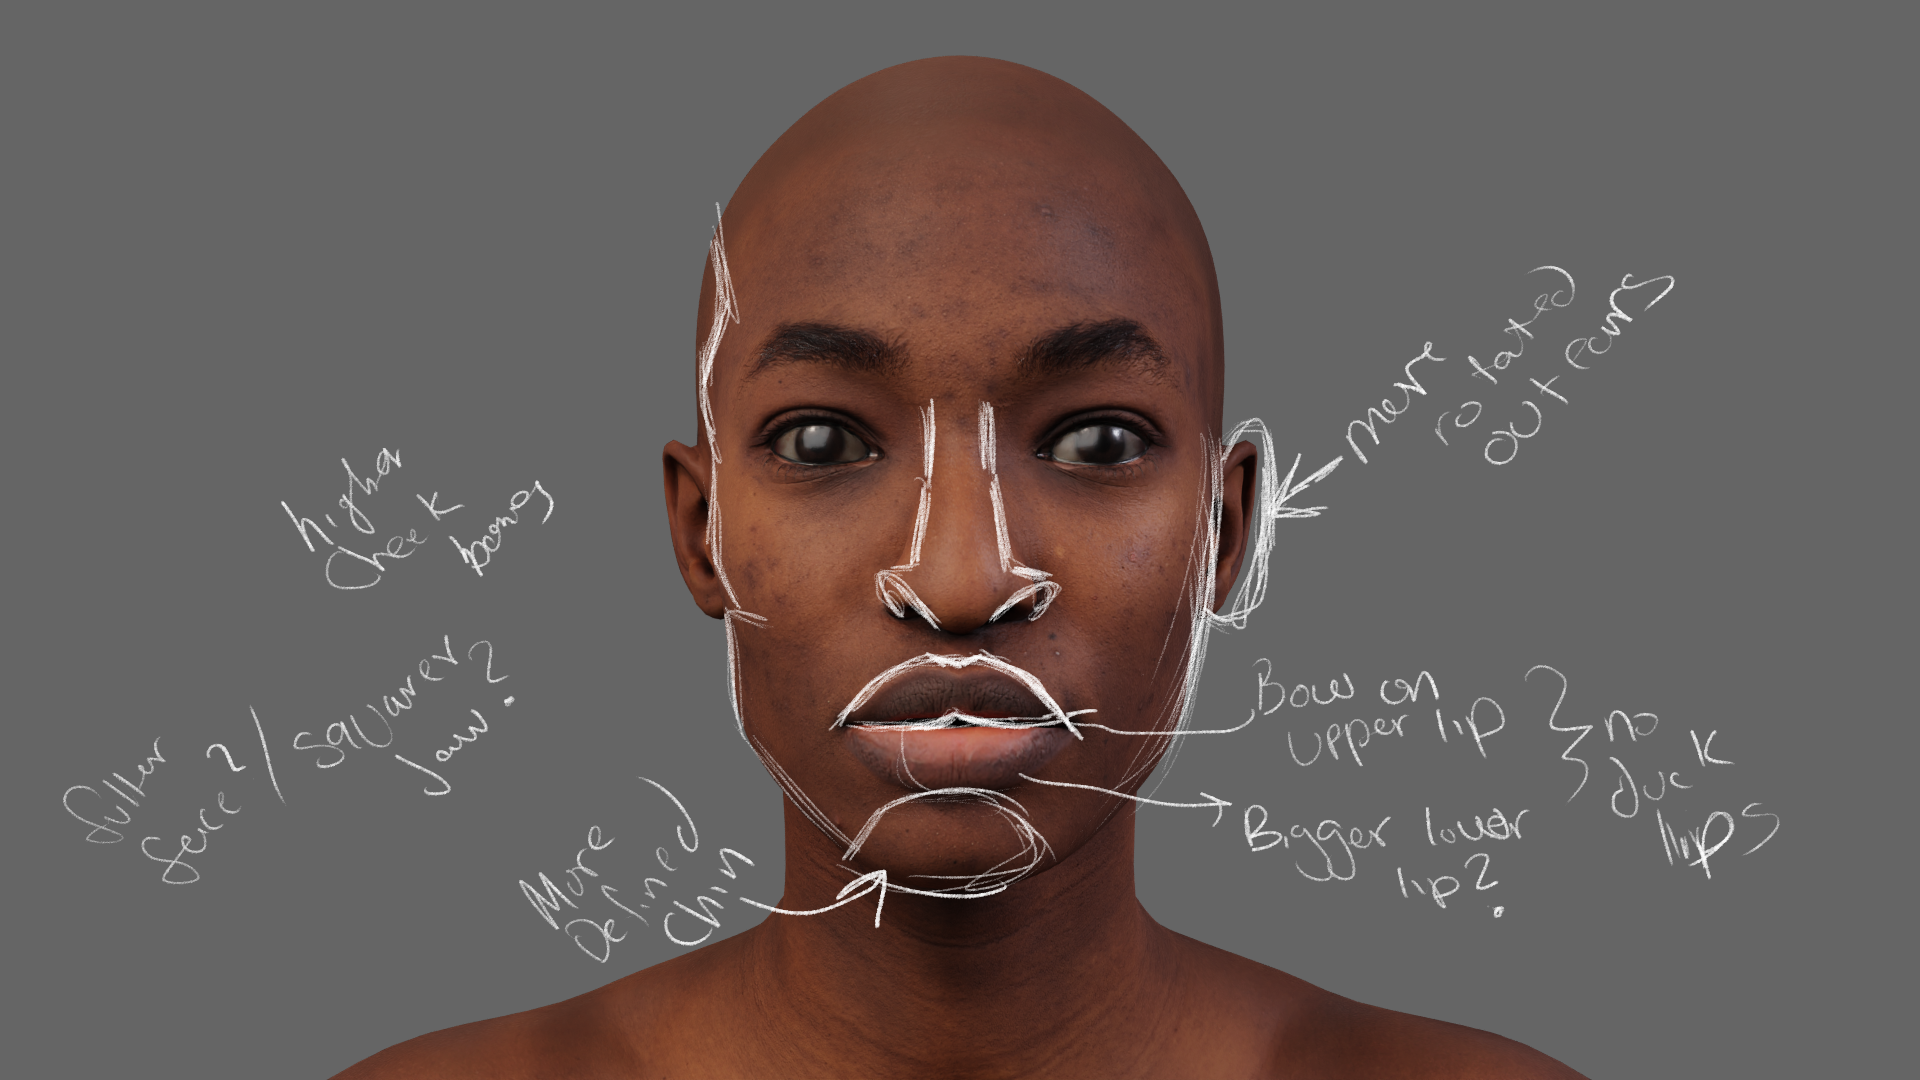
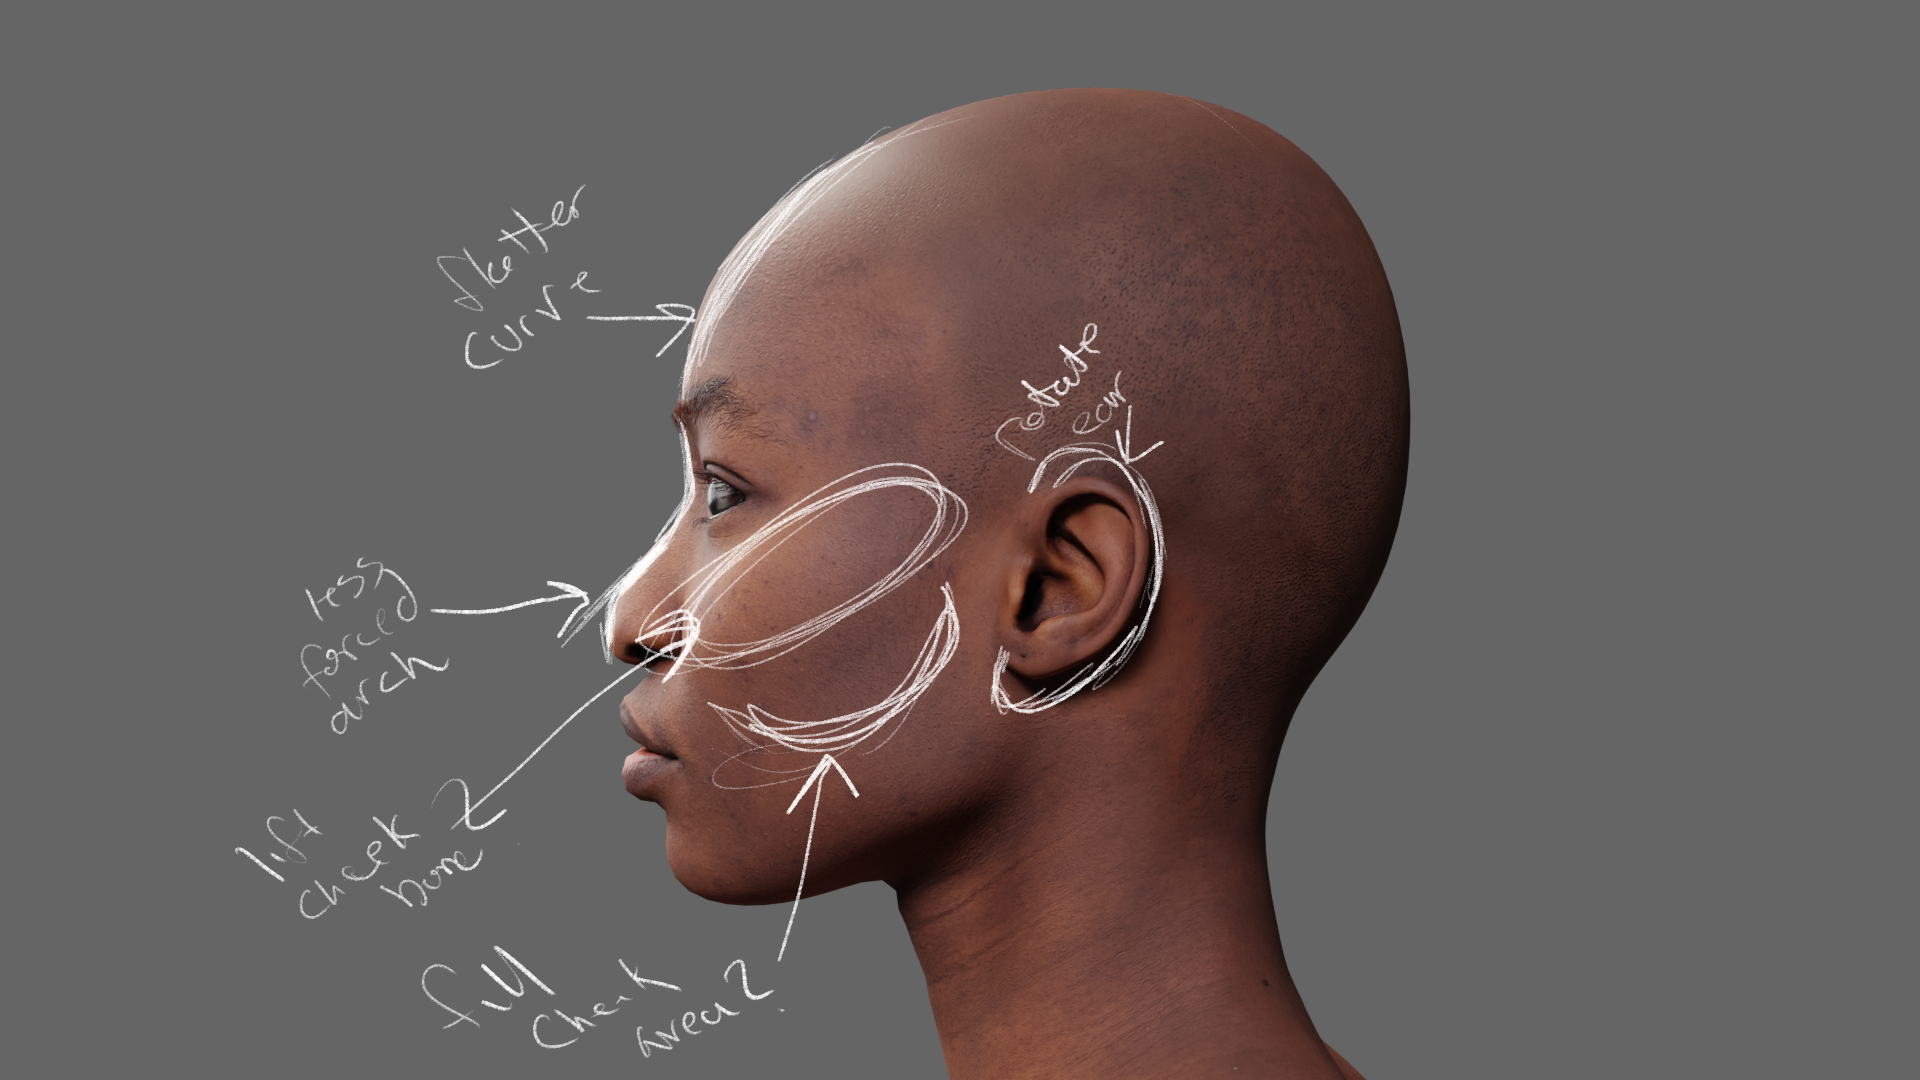
As soon as I downloaded the scan, I imported it into Zbrush and Blender to make sure all the assets were loading properly and all the textures connected. I immediately found that the lense assets on the eyes will need some work. Once everything was set up and I got some rough lighting I rendered out closeups and made some notes of the facial changes I wanted to make on the model in photoshop.
I did gather real life reference before I started sculpting in Zbrush for both the face and the body. I'm still gathering reference so I'll share more about that as I go. This is the first pass on the face and body. Most of the first pass was focused on getting more sharp angles to the face and widening the hips of the model.
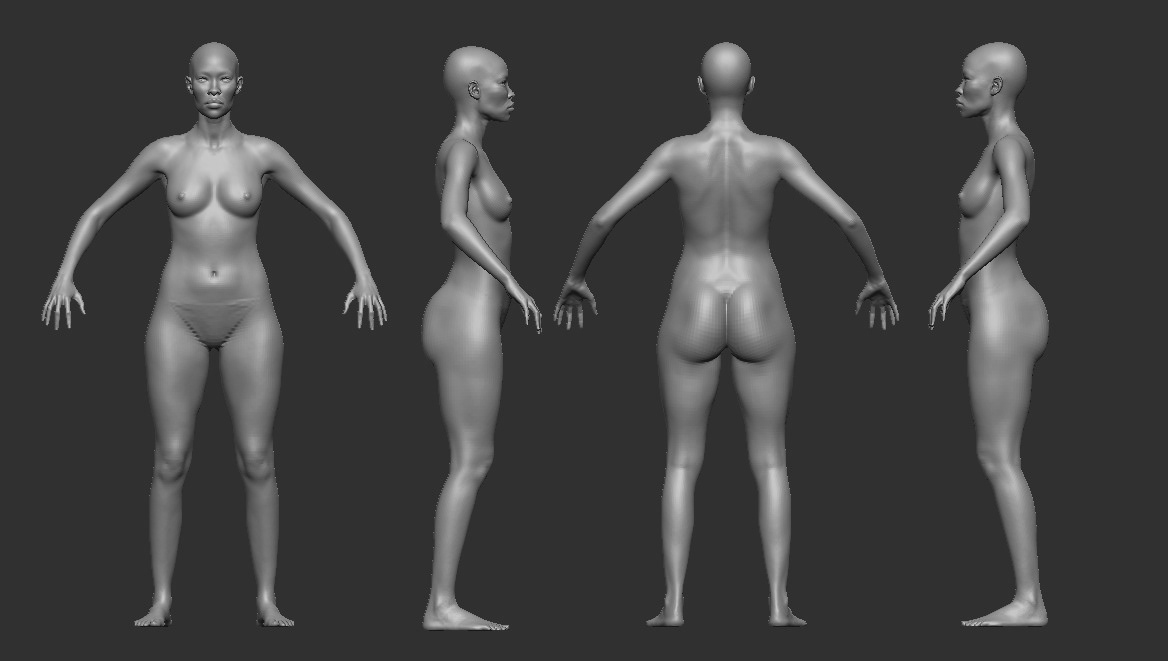
First Pass Model Turn Around
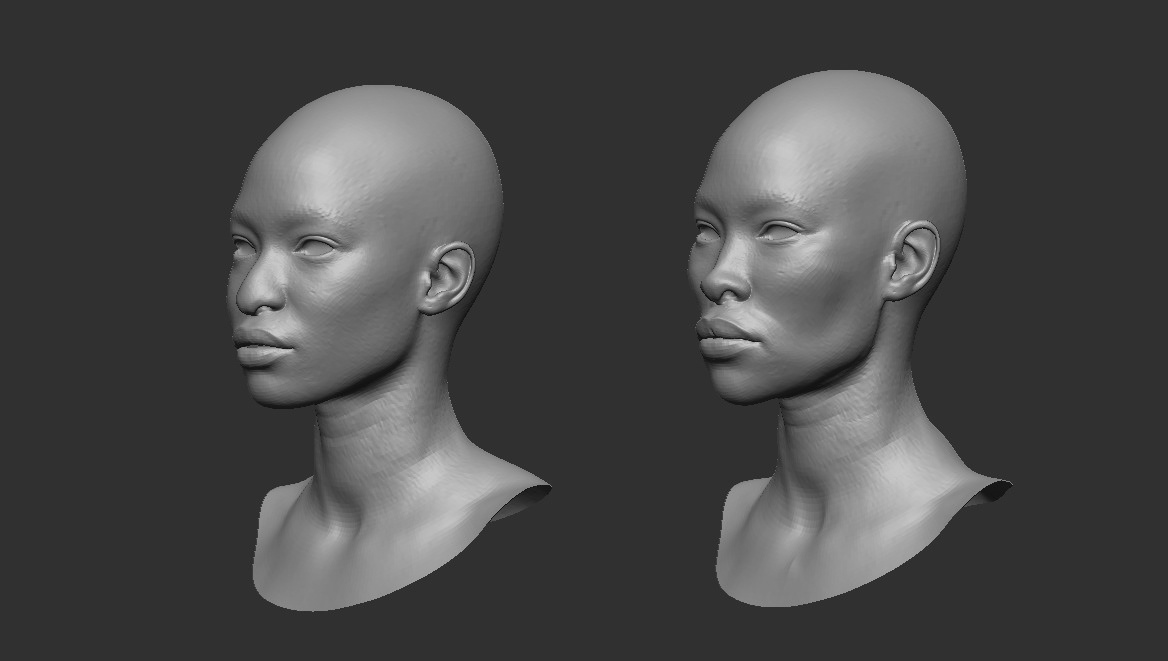
Left: Original Scan Head Right: First Pass Head
I uploaded the first pass to Blender and rendered out a turntable with and without textures just to see how everything looked under lights and with proper textures. Seeing everything together under lights and textures I could see immediately that the nose on my model was not broad enough. The ears look much better after I rotated them out and scaled them up a little bit. Of course areas I hadn't touched (the arms, shin area, neck, upper back) needed some attention. I also felt like the stomach area needed more roundness and density to balance out the butt and to have the figure look more like my references.
After the first pass was done, I went back to Zbrush and took more time on the face, stomach, and lower leg areas of the model. I did not focus on the arms because I know that the rig will deform them and I want to see how they look deformed so I know what muscles need to worked the most.
I did rerig my character to create a simple walking cycle. This time I used Accurig from ActorCore. I had mentioned how incredible this software is and it truly is amazing! It also has a free add-on for Blender import rigs and characters even more simply than Mixamo.
After rigging my character, I immediately saw the deforming of the armpits which was my greatest worry. I also see that the arms look underdeveloped which was expected and will be my next anatomy step. The neck looks a little too thin so I'll have to work on that. The upper chest looks good. I think I'm going to want to make a defined collar bone later one. The stomach, hips, and thighs look exactly as I want them for now.
I also took some updated closeup shots of the face so far. I really love the nose. The ears size is looking good. I think I could even go slightly bigger on the ears. The lips are looking good. I might play around with the lower lip shape later on. I will be making new eyebrows down the line.

